Nowadays, video is everywhere: websites, advertisements, sales content, and more. Indeed, it is safe to say that video has become an essential part of any marketing strategy. If you are developing video content, you are riding the right wave but: how to ensure your brand sticks? How to make each of your videos identifiable in a split second?
The answer is simple, an animated logo can do the trick. It is a simple way to add your brand and identity to every piece of content by placing it at the beginning, the end, or both. The best part is that creating an animated logo is easier than you might think. It only takes a few minutes and uses a tool that pretty much anyone has access to: PowerPoint.
Our good old friend PowerPoint has yet another trick up its sleeve, and today we are breaking it to you in a few simple steps. So, get your PowerPoint on and create your animated logo today!
1. Upload your logo
Upload (or create) your logo in a new slide. It is important to keep in mind that, if you want different parts of your logo to move around, objects should be ungrouped.

2. Create your different frames
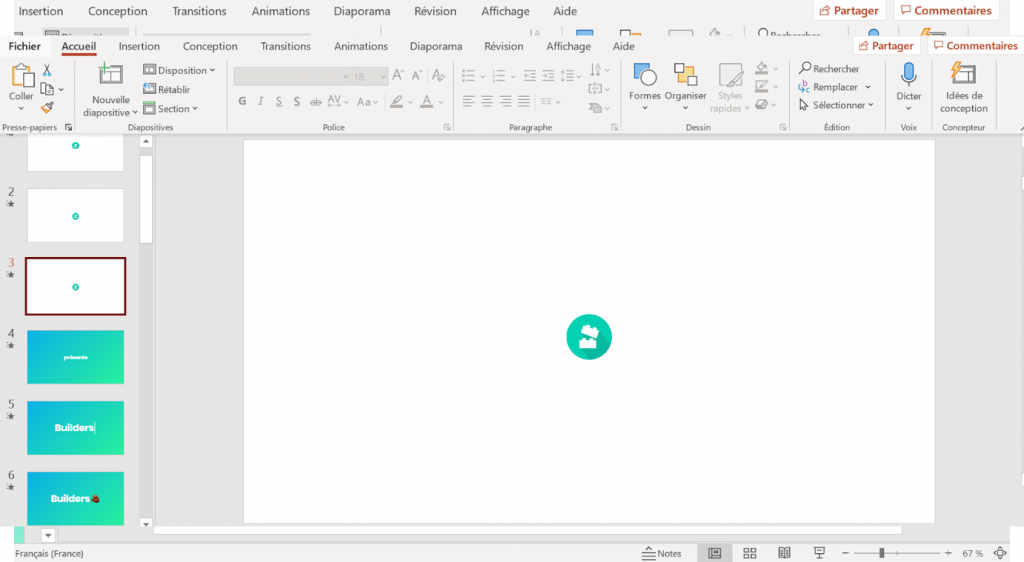
If you want to add big movements to your animation such as a change in the size of your logo or background you need to create different frames.
In other words, you should add one slide per frame you need in your animation as shown in the image below.
The trick is in editing each slide (or frame of your animation) individually and seamlessly assemble them.

3. Add animations
Once your frames are ready, it is time to focus on the animation part of it all. To do this, you will need to open your Animation Widget located on top of your screen.
Choose the object you want to add movement to, then click on “Add Animation”. You can also choose animation directly from the sample on the left side. It will apply the chosen effect to the object you previously selected.

If you wish to add additional animations, click the same button (Add Animation) again. You must click that button to add a new animation that follows your first choice. If you choose your second animation from the sample gallery, it will replace your first choice.
4. Adjust animation timing
Once you have finished creating your animations, you need to set a start time and a duration for each of them. To do this simply go to the Animation pane and right-click on the animation you want to edit. You have several options :
- Select “Start with previous” to have multiple animations coincide
- Select “Start After Previous” to have animations set in a sequence
- Select “Timing” to define the duration for the animation
- Select “Effect Options” to change details in the effect such as the direction of a certain animation for example.

We advise you to choose “Start on click” for your first animation and then follow with start with previous or start after previous according to your preference.
You should then check timing for each of your animations: this will give you a pretty good overview of the result you will get in terms of length and design.
Do not hesitate to play with timing and effects to get a neat result! Simply click on “Start Presentation” to get a preview and adjust accordingly.
5. Download your animated logo
Now that you have played with animations and obtained a result you are happy with it is time to download your artwork!
To create the video, choose File > Export > Create a Video. From the drop-down list, choose the video quality. The options may vary depending on your version of PowerPoint. Indeed, more recent versions offer up to 4K.

Good to know
A few more tips and tricks to help you along the way :
- You can also export your work as an animated GIF. This format might be more appropriate if you want to use your animated logo by itself on your website or in an email for example.
- You can add a custom motion path to your animation: Animations >Add Animation >Advanced Animation > Custom path. By choosing this option you are required to draw out the path your object should take. Click and drag to draw your path or simply click to create straight lines with connection points. Once you finish you can double click at the end of the path to preview the movement.
Now that you understand the basics, you can play around with the different animation possibilities even beyond your corporate logo! Just keep in mind that effects are not too disruptive by checking the final result as you go on. Your audience will remember the information according to the importance you give it and the way you choose to present it.